Somewhere along the line I lost my rolling-pin. Well, I don’t imagine I really lost it, I suspect it was a deliberate choice on my part to part company around the same time I decided to pass the baton for baking and decorating Christmas sugar cookies to my daughter. I know I gave her my entire assortment of cookie cutters; the rolling-pin may have been part of the endowment too.
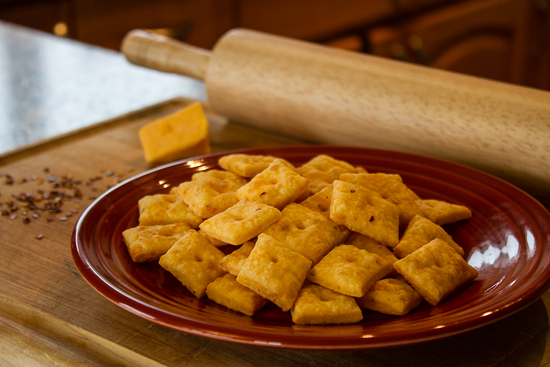
Having been sans rolling-pin for a few years my plan to learn how to make crackers fell by the wayside. Instead, I collected recipes on my Pinterest board and kept the idea in the back of my mind for a post-retirement project. This week I decided it was time to break into the cracker-making mode and so I popped over to my favourite online shopping site–Amazon.ca–and ordered a rolling-pin that arrived on my doorstep like magic two days later.

There were two factors in my choice of cracker to make this week. First, my obsession with cheesy rice cakes that I partake in almost nightly; and second, a fridge that is chock-full of cheese due to recent stellar sales on cheese at the grocery story. Cheese crackers it was!
I’ve had a recipe stored on my Pinterest board from In The Kitchen With Kath for a while. There are many similar recipes floating around cyberspace; this is the one I chose to follow. It couldn’t be easier.
Yield: I got two large cookie sheets of 1 inch crackers.
Ingredients
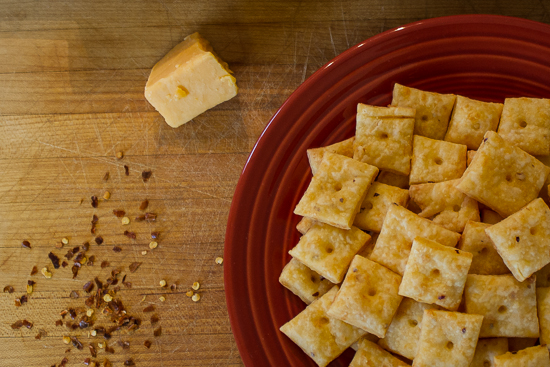
- 1 1/2 cups (about 6 ounces) of grated sharp cheddar cheese
- 4 Tbsp. unsalted butter cut into small pieces
- 3/4 cup flour
- 1/2 tsp. salt
- 1/2 tsp. crushed red pepper flakes
- 1 Tbsp. milk. (I actually ended up using closer to 3 Tbsp.)
Instructions
Preheat oven to 350 degrees.
Put the cheese, butter, salt, and red pepper flakes in the food processor and pulse a few times until the dough is crumbly.
Add the milk and process until the dough forms a ball. I added the 1 Tbsp. of milk the recipe called for and processed the dough. It was nowhere near close to forming a ball and so I just added a bit more a few times until it was the right consistence. Guessing the difference in what I needed to use has something to do with altitude. Who knows.
Roll the dough on a floured counter (with your brand new rolling-pin!) to about 1/8 inch thickness.
Cut the dough into 1 inch squares with a sharp knife.
Use the flat end of a skewer (I used a chopstick) to poke a hole in the middle of each cracker.
Put the crackers on a parchment-lined baking sheet allowing about 1/4 inch between each one. (Parchment paper is my new best friend. I can’t believe it’s taken me so many years to discover it!)
Bake for 12-15 minutes until the edges are just starting to brown.
And that’s it! Couldn’t be easier, right? The recipe says to store in a covered container to be eaten within a couple of days. There’s no way we’ll eat all of these crackers within a couple of days–well, we could, but we won’t–and so I’m going to freeze some of them.
These are absolutely delicious! Cheesy and with just a little bit of a bite. If the quality is still good after freezing I am going to make a lot of these to have on hand around the holidays. Much better than those store-bought preservative-laden crackers that we love to hate.

One of my favorite things to find in my lunchbox at school was cheese and crackers, a separate item. Two saltine crackers with cheese in between. Your recipe is a yummy-looking blend of the two.
Nice transition from canning to snacking, Linda!
It’s a great recipe, Marian. Simple and oh-so-tasty!
test
Thanks for the link to my site, Linda! I have to say that I love your idea about freezing them. I had never thought of that. I may have to get going and freeze some for the holidays. 🙂